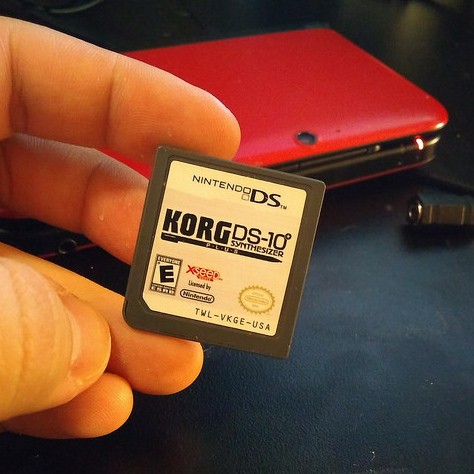
Korg DS-10 Plus is a music applications for the Nintendo DS/DSi/3DS. It’s an updated version of the Korg DS-10 (without “plus” in the name) released in 2008.
You can find the Korg DS-10 Plus as a cartridge. It’s not sold digitally on Nintendo eShop.
These are my ongoing study notes on the Korg DS-10 Plus using a Nintendo 3DS. Fell free to comment corrections and additional information.
Korg DS-10 Plus Key Concepts
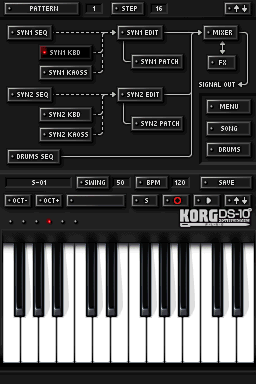
[↑↓] button. The up-down arrow button switch the top screen and the bottom screen, so you can use the stylus pen to interact with the interface. This is the button you will use more often.
[↵] button. This button is usually on the top left corner of the screen. It goes to a next pattern type within a pattern.
[â–º] button. Plays. If you are in a pattern screen, it will play the pattern. If you are in the song screen it will play the song.
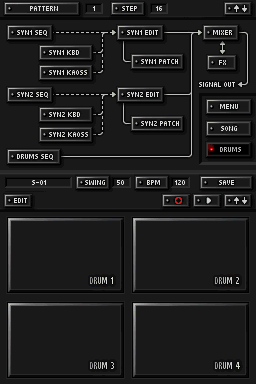
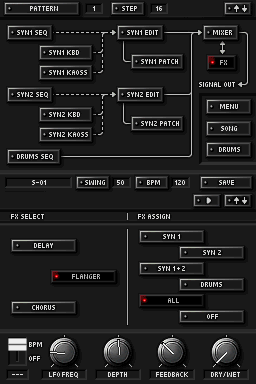
SYN1/SYN2/DRUMS. There are 3 instruments: synthesizer 1 (SYN1), synthesizer 2 (SYN2), and the drums (DRUMS). Both synthesizer are monophonic (only one sound at time). The drums are polyphonic (multiple sounds at the same time). In practice, you can think them as 6 instruments: SYN1, SYN2, DRUM1, DRUM2, DRUM3, DRUM4.
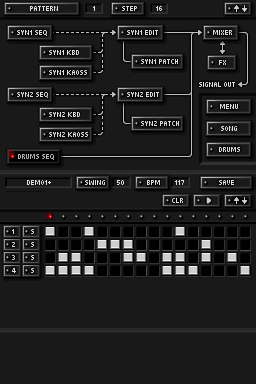
[DRUMS]Â . You can activate each drum (DRUM 1, DRUM2, DRUM 3, DRUM 4). Because each drum is an individual instrument you can have more than one drum producing sound at the same time. The 4 drum configurations belong to a session.
STEP. A step is an programed single invocation of instrument, modifier, or effects. You can program steps using one of the sequence editors or using the [⚬] record button.
SEQ. A sequence is a series of steps. A sequence can have up to 16 steps. The sequence size is determined by the pattern size.
DRUM SEQ. In a drum sequence you can create up to 16 steps for the 4 drums. You can play drums simultaneously.
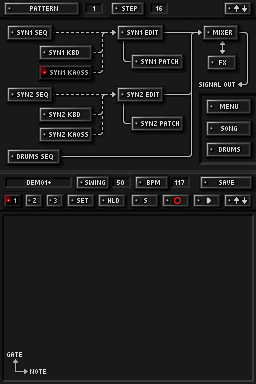
SYN1 SEQ/SYN2 SEQ. In a synthesizer sequence you can create up to 16 NOTE steps for a synthesizer, plus a correspondent sequence of steps for GATE, VOLUME, PAN, KAOSSX, and KAOSSY. You can access the different sequences pressing the [↵].
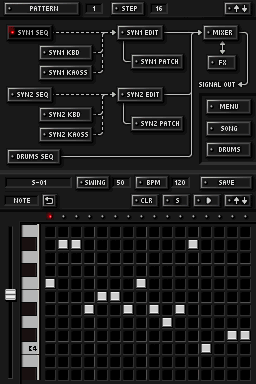
SYN1 KBD / SYN2 KBD. The keyboards control tones of a synthesizer. You can use it to play live or to record note sequences using the [⚬] record button.
[OCT -] . Lowers one octave. All notes in the keyboard gets one octave lower pitch tones.
[OCT +]. Raises one octave. All notes in the keyboard gets one octave higher pitch tones.
SYN1 EDIT/ SYN2 EDIT.
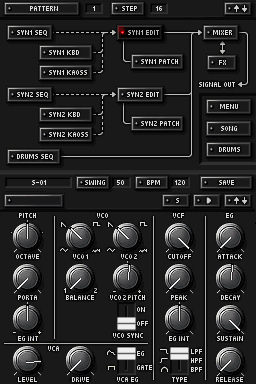
SYN1 PATCH / SYN2 PATCH.

SYN1 KAOSS / SYN2 KAOSS. Simulates Korg Kaoss Pad like effects on top of the SYN1/SYN2. It uses the X and Y axis as inputs when touching the button screen using the stylus. There are 3 X/Y modes. In mode [1], you control an arpeggiator and gate. Press [SET] to change the key note and scale used for the arpeggiator. The mode [2] you control volume and pan. The mode [3] you can press [SET] to choose what you are controlling on each axis. You can pretty much control any synthesizer configuration from mode [3]. You can use KAOSS live or record a KAOSSX/KAOSSY sequence the [⚬] record button.
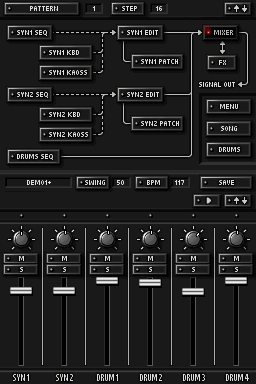
MIXER. Controls the individual volume and balance of each instrument.
FX. Effects for delay, flanger, and Chorus. You an assign an effect to SYN1, SYN2, SYN1+2, DRUMS, ALL, or turn if off.
PATTERN. You can have up to 16 patterns in (called PTN1, PTN2… PTN16) in a session.
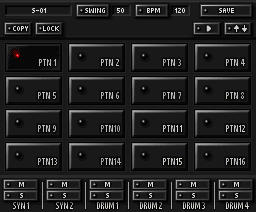
Each pattern has one whole configuration for the synthesizer 1 and 2, drums, MIXER, FX. It has a SYN1 SEQ, SYN2 SEQ, and DRUMS SEQ. A pattern has a size up to 16 steps. The size of a pattern determines the size of all sequences within that pattern. However as you can have multiple patterns, each one of them can have different sizes.
SONG. A song is:
- A sequence of up 100 executions of any of the 16 patterns played one at time.
- A sequence of up 100 mutes of any instruments. You can mute multiple instruments at time. Notice you can use this to get more variations from the patterns, e.g. you can execute PTN1 with and without SYN1.
- All sequences will use the 4 DRUMS of the current session. You cannot have individual DRUMS configurations for each pattern. Other than that, each pattern can have all it’s configurations (SYN* SEQ, SYN* EDIT, SYN* PATCH, MIXER, FX, etc).
Additionally to that, you have a sequence of mutes. You can access the editor for this sequence clicking in the return button in the song editor. You can mute SYN1, SYN2, DRUM1, DRUM2, DRUM3, and DRUM4 individually and in any combination on a given step of a song sequence (up to 100 steps).
This should cover the basic concepts and should be enough to start playing, creating sounds and musics using the Korg DS-10 Plus.
Korg DS-10 Plus Advanced
Some of more advanced concepts I want to explore in the future and expand in this tutorial.
- Korg DS-10 Plus Custom Instruments
- Recording
- Running instances of Korg DS-10 Plus
- Using KORG DS-10 Plus with other devices
- Voice modulation (pseudo formant synthesis)
Korg DS-10 Bookmarks
Some albums created using only the Korg DS-10:


