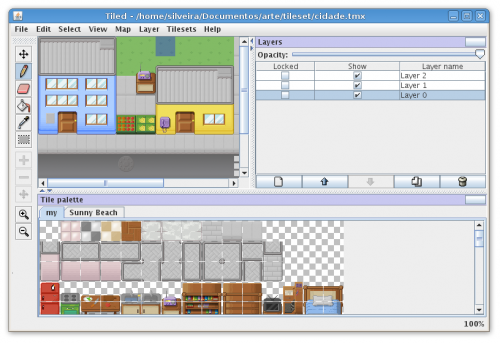
I’m using the Tiled Map Editor for a while, I even wrote that tutorial about it. It’s a general purpose tile map editor, written in Java but now migrating to C++ with Qt, that can be easily used with my set of free pixelart tiles.

A map done with Tiled is stored in a file with TMX extension. It’s just a XML file, easy to understand.
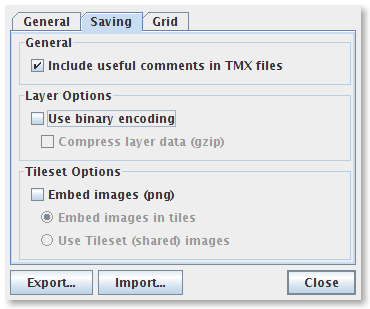
As I’m creating a map loader for my owns purposes, the procedure I’m doing here works we need some simplifications. I’m handling orthogonal maps only. I’m not supporting tile properties as well. I also don’t want to handle base64 and zlib encoding in this version, so in the Tiled editor, go at the menu Edit → Preferences and in the Saving tab unmark the options “Use binary encoding” and “Compress Layer Data (gzip)”, like this:

When saving a map it will produce a TMX file like this:
For processing it on Python I’m using the event oriented SAX approach for XML. So I create a ContentHandler that handles events the start and end of XML elements. In the first element, map, I know enough to create a Pygame surface with the correct size. I’m also storing the map properties so I can use it later for add some logics or effects on the map. After that we create a instance of the Tileset class from where we will get the each tile by an gid number. Each layer has it’s a bunch of gids in the correct order. So it’s enough information to mount and draw a map.
# Author: Silveira Neto
# License: GPLv3
import sys, pygame
from pygame.locals import *
from pygame import Rect
from xml import sax

class Tileset:
    def __init__(self, file, tile_width, tile_height):
        image = pygame.image.load(file).convert_alpha()
        if not image:
            print "Error creating new Tileset: file %s not found" % file
        self.tile_width = tile_width
        self.tile_height = tile_height
        self.tiles = []
        for line in xrange(image.get_height()/self.tile_height):
            for column in xrange(image.get_width()/self.tile_width):
                pos = Rect(
                        column*self.tile_width,
                        line*self.tile_height,
                        self.tile_width,
                        self.tile_height )
                self.tiles.append(image.subsurface(pos))

    def get_tile(self, gid):
        return self.tiles[gid]

class TMXHandler(sax.ContentHandler):
    def __init__(self):
        self.width = 0
        self.height = 0
        self.tile_width = 0
        self.tile_height = 0
        self.columns = 0
        self.lines  = 0
        self.properties = {}
        self.image = None
        self.tileset = None

    def startElement(self, name, attrs):
        # get most general map informations and create a surface
        if name == 'map':
            self.columns = int(attrs.get('width', None))
            self.lines  = int(attrs.get('height', None))
            self.tile_width = int(attrs.get('tilewidth', None))
            self.tile_height = int(attrs.get('tileheight', None))
            self.width = self.columns * self.tile_width
            self.height = self.lines * self.tile_height
            self.image = pygame.Surface([self.width, self.height]).convert()
        # create a tileset
        elif name=="image":
            source = attrs.get('source', None)
            self.tileset = Tileset(source, self.tile_width, self.tile_height)
        # store additional properties.
        elif name == 'property':
            self.properties[attrs.get('name', None)] = attrs.get('value', None)
        # starting counting
        elif name == 'layer':
            self.line = 0
            self.column = 0
        # get information of each tile and put on the surface using the tileset
        elif name == 'tile':
            gid = int(attrs.get('gid', None)) - 1
            if gid <0: gid = 0
            tile = self.tileset.get_tile(gid)
            pos = (self.column*self.tile_width, self.line*self.tile_height)
            self.image.blit(tile, pos)

            self.column += 1
            if(self.column>=self.columns):
                self.column = 0
                self.line += 1

    # just for debugging
    def endDocument(self):
        print self.width, self.height, self.tile_width, self.tile_height
        print self.properties
        print self.image

def main():
    if(len(sys.argv)!=2):
        print 'Usage:\n\t{0} filename'.format(sys.argv[0])
        sys.exit(2)
    pygame.init()
    screen = pygame.display.set_mode((800, 480))
    parser = sax.make_parser()
    tmxhandler = TMXHandler()
    parser.setContentHandler(tmxhandler)
    parser.parse(sys.argv[1])
    while 1:
        for event in pygame.event.get():
            if event.type == QUIT:
                return
            elif event.type == KEYDOWN and event.key == K_ESCAPE:
                return
        screen.fill((255,255,255))
        screen.blit(tmxhandler.image, (0,0))
        pygame.display.flip()
        pygame.time.delay(1000/60)

if __name__ == "__main__": main()
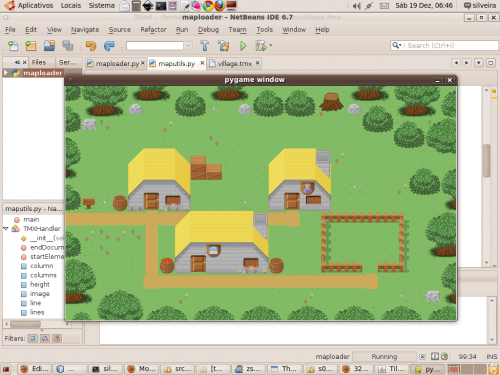
Here is the result for opening a four layers map file:

That’s it. You can get this code and adapt for your game because next versions will be a lot more coupled for my own purposes and not so general.
Download:![]() maploader.tar.bz2 It’s the Netbeans 6.7 (Python EA 2) project file but that can be opened or used with another IDE or without one. Also contains the village.tmx map and the tileset.
maploader.tar.bz2 It’s the Netbeans 6.7 (Python EA 2) project file but that can be opened or used with another IDE or without one. Also contains the village.tmx map and the tileset.


