I got a simple motor from a broken domestic printer. It’s a Mitsumi m355P-9T stepping motor. Any other common stepping motor should fits. You can find one in printers, multifunction machines, copy machines, FAX, and such.
With a flexible cap of water bottle with a hole we make a connection between the motor axis and other objects.
With super glue I attached to the cap a little handcraft clay ox statue.
It’s a representation from a Brazilian folkloric character Boi Bumbá. In some traditional parties in Brazil, someone dress a structure-costume and dances in circular patterns interacting with the public.

Photos by Marcus Guimarães.
Controlling a stepper motor is not difficult. There’s a good documentation on how to that on the Arduino Stepper Motor Tutorial. Basically it’s about sending a logical signal for each coil in a circular order (that is also called full step).

Animation from rogercom.com.

You’ll probably also use a driver chip ULN2003A or similar to give to the motor more current than your Arduino can provide and also for protecting it from a power comming back from the motor. It’s a very easy find this tiny chip on electronics or automotive stores or also from broken printers where you probably found your stepped motor.

With a simple program you can already controlling your motor.
// Simple stepped motor spin
// by Silveira Neto, 2009, under GPLv3 license
// http://silveiraneto.net/2009/03/16/bumbabot-1/
int coil1 = 8;
int coil2 = 9;
int coil3 = 10;
int coil4 = 11;
int step = 0;
int interval = 100;

void setup() {
  pinMode(coil1, OUTPUT);
  pinMode(coil2, OUTPUT);
  pinMode(coil3, OUTPUT);
  pinMode(coil4, OUTPUT);
}

void loop() {
  digitalWrite(coil1, step==0?HIGH:LOW);
  digitalWrite(coil2, step==1?HIGH:LOW);
  digitalWrite(coil3, step==2?HIGH:LOW);
  digitalWrite(coil4, step==3?HIGH:LOW);
  delay(interval);
  step = (step+1)%4;
}
Writing a little bit more generally code we can create function to step forward and step backward.
My motor needs 48 steps to run a complete turn. So 360º/48 steps give us 7,5º per step. Arduino has a simple Stepper Motor Library but it doesn’t worked with me and it’s also oriented to steps and I’d need something oriented to angles instead. So I wrote some routines to do that.
For this first version of BumbaBot I mapped angles with letters to easy the communication between the programs.

Notice that it’s not the final version and there’s still some bugs!
// Stepped motor control by letters
// by Silveira Neto, 2009, under GPLv3 license
// http://silveiraneto.net/2009/03/16/bumbabot-1/
int coil1 = 8;
int coil2 = 9;
int coil3 = 10;
int coil4 = 11;
int delayTime = 50;
int steps = 48;
int step_counter = 0;
void setup(){
pinMode(coil1, OUTPUT);
pinMode(coil2, OUTPUT);
pinMode(coil3, OUTPUT);
pinMode(coil4, OUTPUT);
Serial.begin(9600);
}
// tells motor to move a certain angle
void moveAngle(float angle){
int i;
int howmanysteps = angle/stepAngle();
if(howmanysteps<0){
howmanysteps = - howmanysteps;
}
if(angle>0){
for(i = 0;i
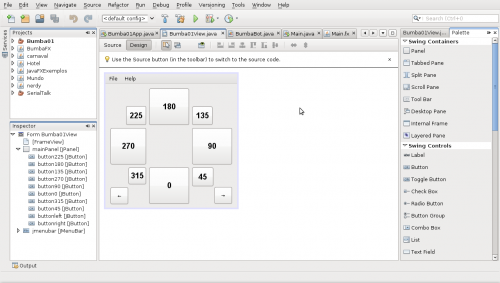
In another post I wrote how create a Java program to talk with Arduino. We'll use this to send messages to Arduino to it moves.Â

[put final video here]
To be continued... 🙂


