Tag: 3d
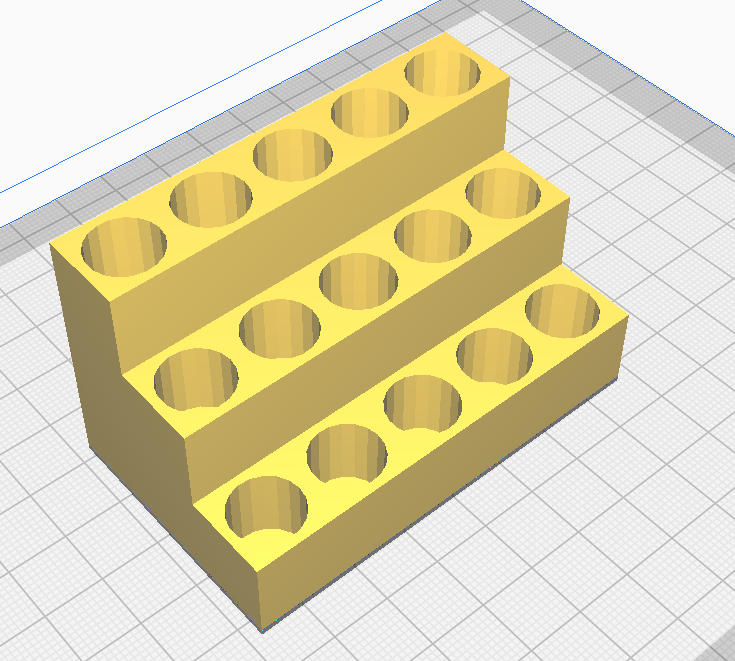
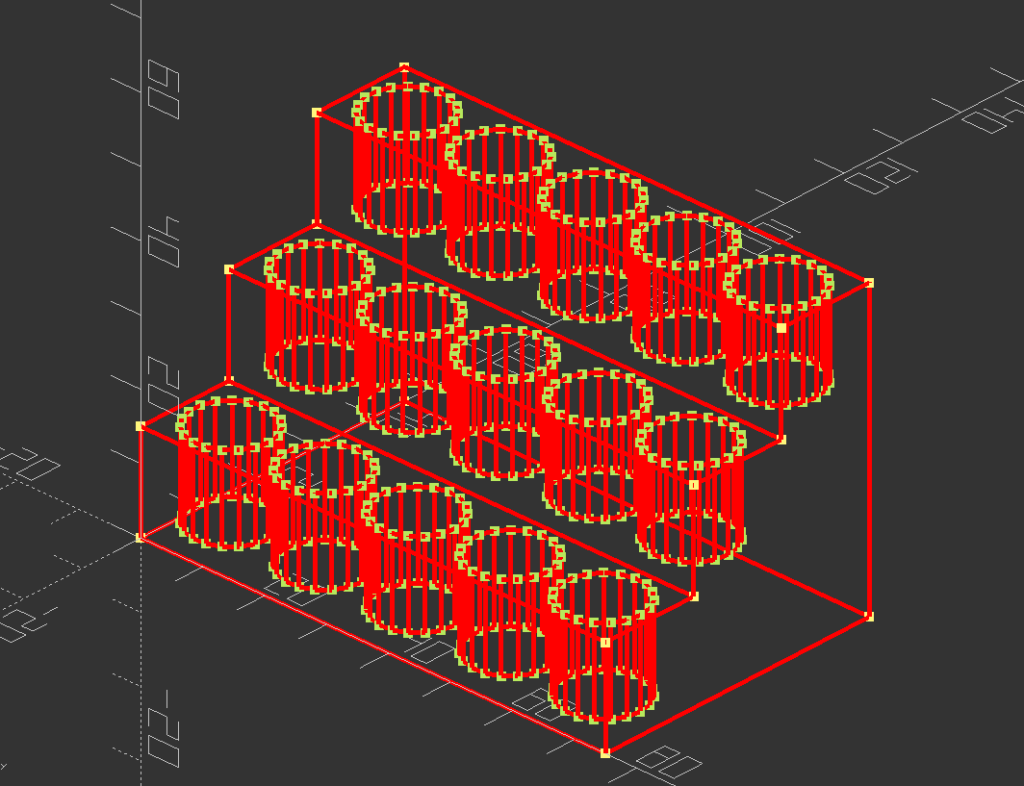
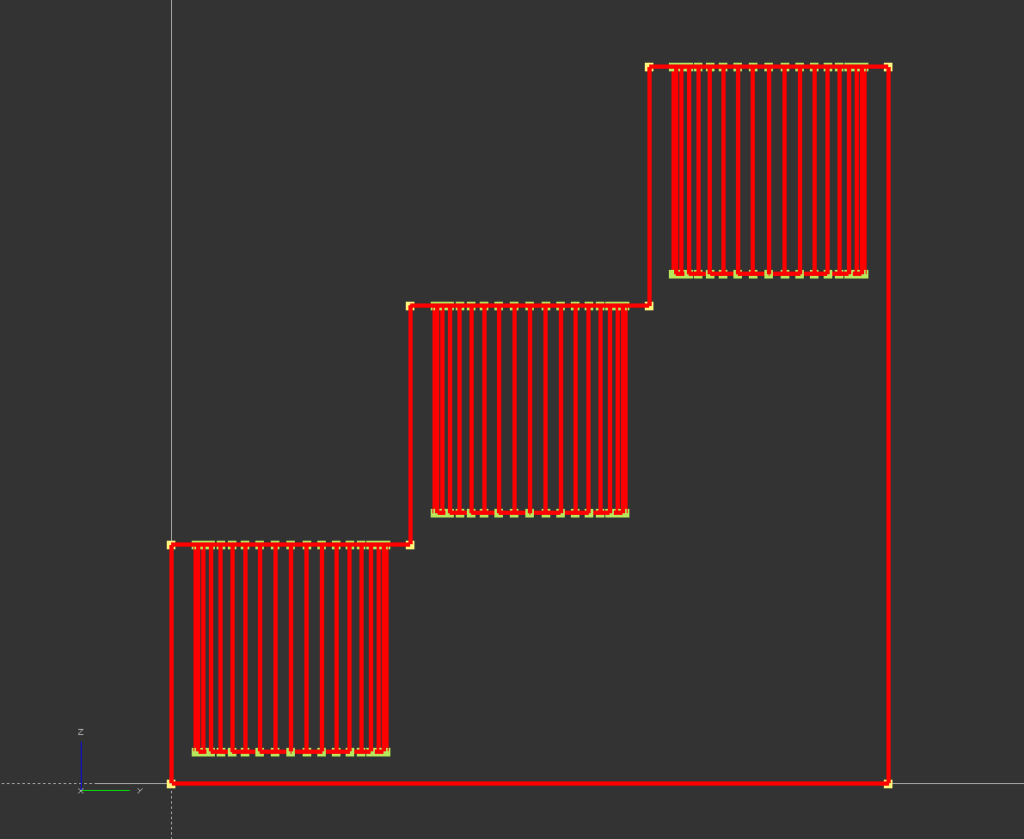
My first thing in the Thingiverse: https://www.thingiverse.com/thing:6927048.
Sources at https://github.com/silveira/silveira_3d_models
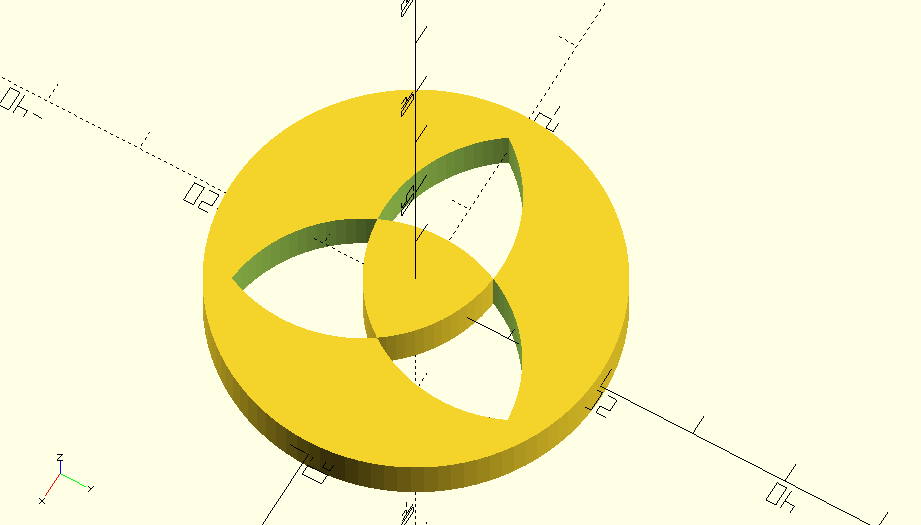
$fn=100;

HEIGHT = 5;

CENTER_DISTANCE = 10;
OUTER_RADIUS = 40;
INNER_RADIUS = 30;

module inner_circle(position) {
  rotate([0,0,(360/3)*position])
    translate([CENTER_DISTANCE,0,0])
      cylinder(d=INNER_RADIUS, h=HEIGHT, center=true);
}

module logo() {
  difference() {
    cylinder(d=OUTER_RADIUS, h=HEIGHT-0.01, center=true);

    union() {
      intersection() {
        inner_circle(0);
        inner_circle(1);
      }

    intersection() {
      inner_circle(1);
      inner_circle(2);
    }

    intersection() {
      inner_circle(0);
      inner_circle(2);
      }
    }
  }

  // piece in the middle
  intersection() {
    inner_circle(0);
    inner_circle(1);
    inner_circle(2);
  }
}

logo();In 2016 I got a Monoprice Select Mini 3D Printer (model number 15365) for $200 USD. That was incredibly affordable for a 3D printer back then. That printer only gave me disappointments. I was never was able to print anything completely with it. My main problem was adhesion. The only help I got was online forums (there was a really active Facebook group about it). Debugging and trying different solutions without any success was not fun. It ended up just accumulating dust and occupying space in a corner.
Years later I found that my local library had working and calibrated 3d printers that I could just use. Just upload a .stl file and they would just email me when the print was ready. Also, for free. I tried it and it worked really well.
So I filled some paperwork and donated my Monoprice Select Mini 3D Printer to the library. They also had a lot of other cool technology programs going on. From now on if I need to print something I know I could just use the library. I promise myself I would not mess with 3D printers themselves anymore.
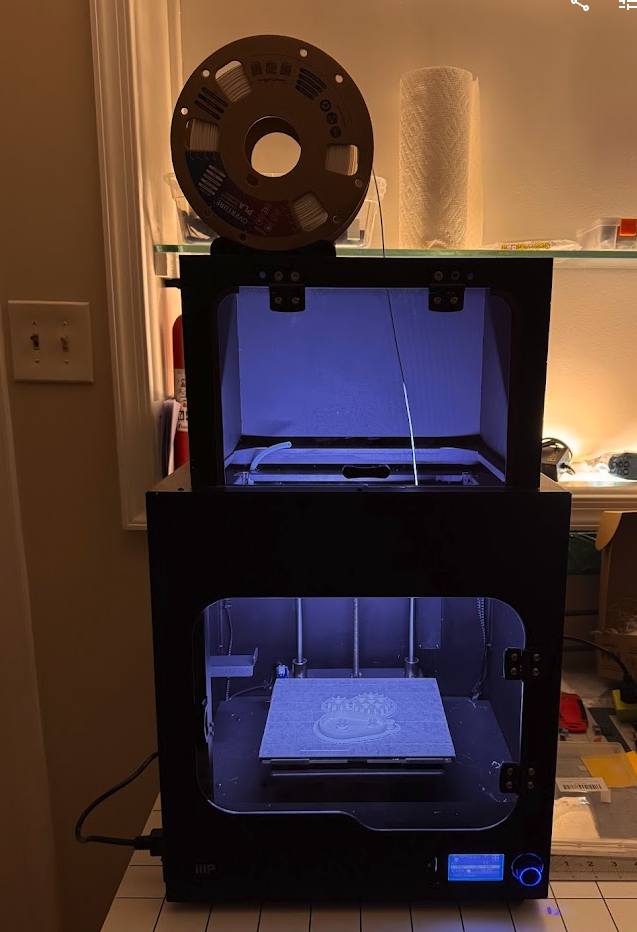
Now in 2025, someone in the neighborhood was looking to donate their Monoprice Maker 2 Ultimate 3D printer. Just when I thought I was out, they pulled me back in. I got it from his hands, bought a spool of PLA Filament and started playing with it.

Monoprice Maker 2 Ultimate 3D printer technical specifications:
- Maximum build volume: 200 x 150 x150mm
- Filament diameter: 1.75mm
- Nozzle Diameter: 0.4mm
- Maximum Nozzle Temperature: 250°C
- Maximum Build Plate Temperature: 100°C
- Printing Speed: 20 ~ 150 mm/sec
- Positioning Accuracy: XY Axis: 0.011mm, Z-Axis: 0.0025mm
- Supported Filament Types: ABS, PLA, PLA Pro, TPU, TPE, PET, Metal fill, Wood fill, etc.
- Supported Software: Wiibuilder, Cura, Simplify3D, Slic3r, Kisslicer
- Supported File Formats: .STL, .gcode, .OBJ
- Print Interface: USB, microSD card
- Input Power: 24 VDC, 10A
- AC Adapter Input Power: 100 ~ 240 VAC, 50/60 Hz
- Maximum Power Consumption: 200 watts
- Dimensions: 15.0″ x 13.4″ x 16.5″ (380 x 340 x 420 mm)
- Weight: 33.1 lbs. (15kg)
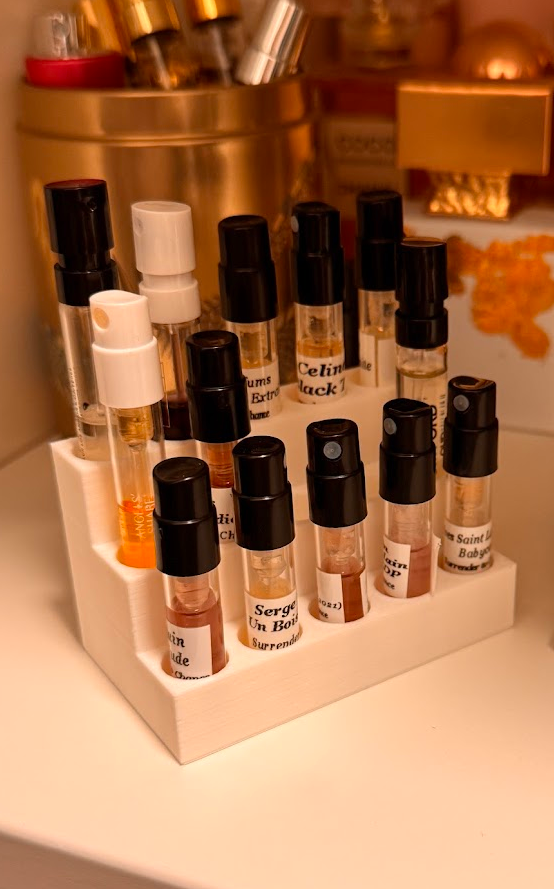
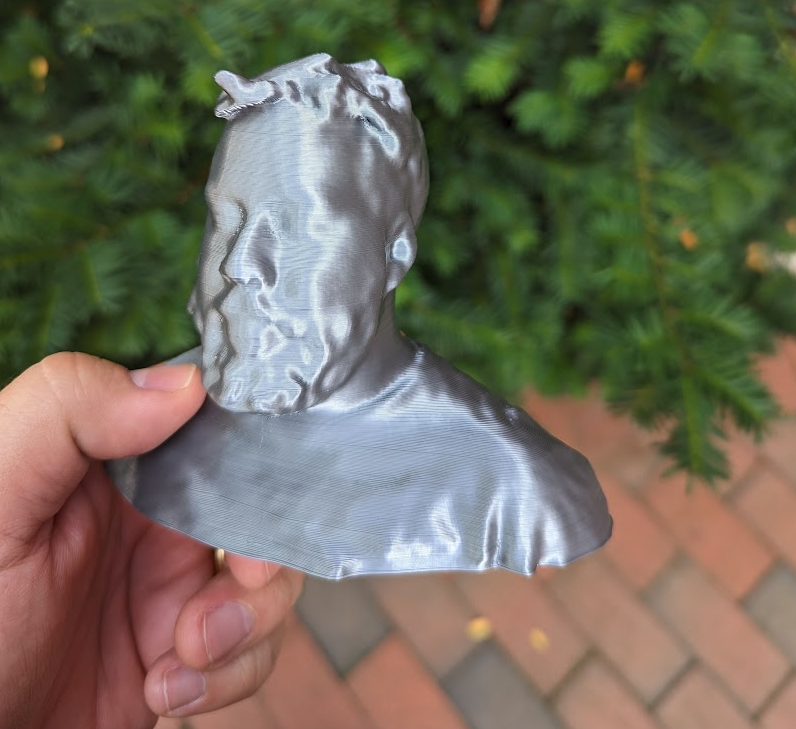
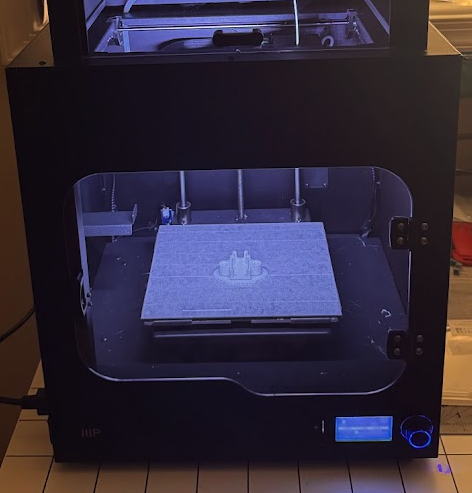
I started just printing whatever gcode it had on its sdcard. My first prints were just adhesion failures again. That’s when my previous experiences from before were handy. I re-applied painters tape on the print bed, then the prints started to get further and further before failing. Then I got my first complete 3d print.
Then I started trying with Thingverse stl objects, cutting them in Ultimaker Cura and printing my own gcodes. Here is the catch: the Monoprice Maker 2 Ultimate is a rebranded Weedo F150s. After I configured Cura to use a Weedo F150s the gcodes produced started to print with success.

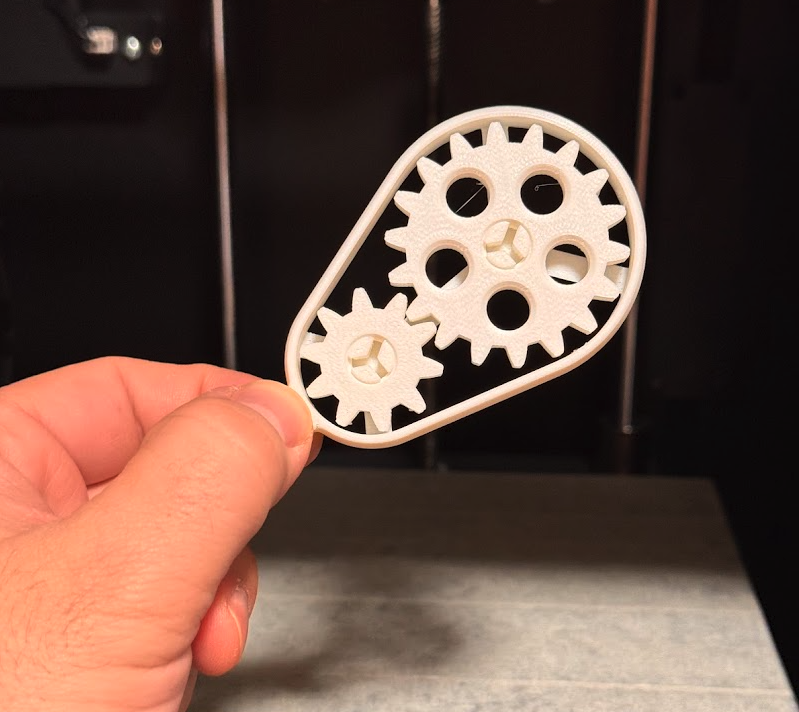
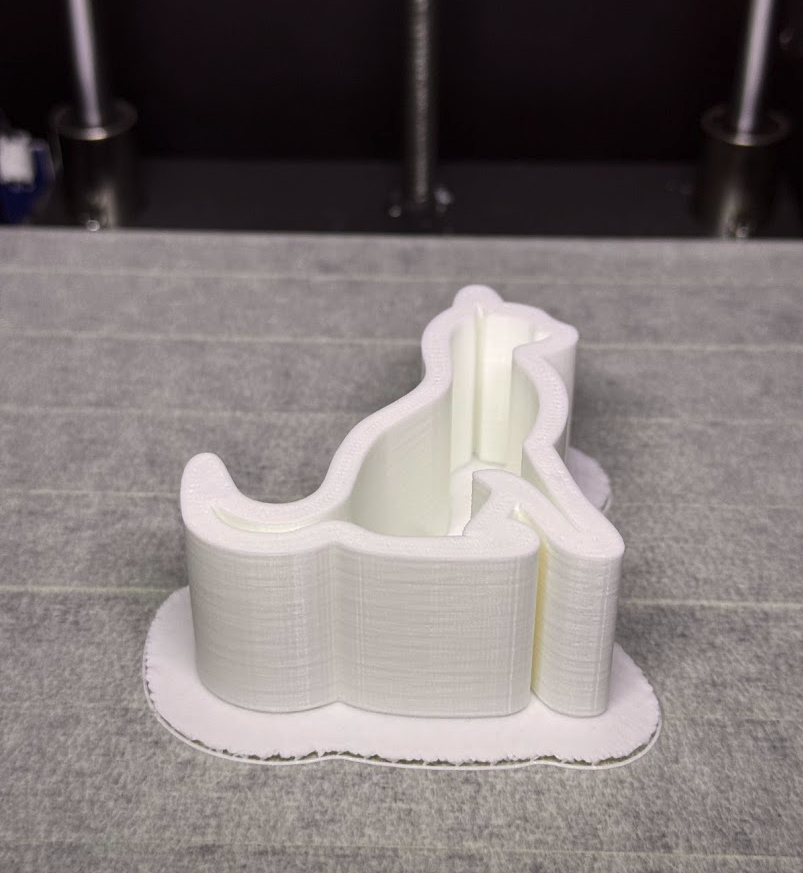
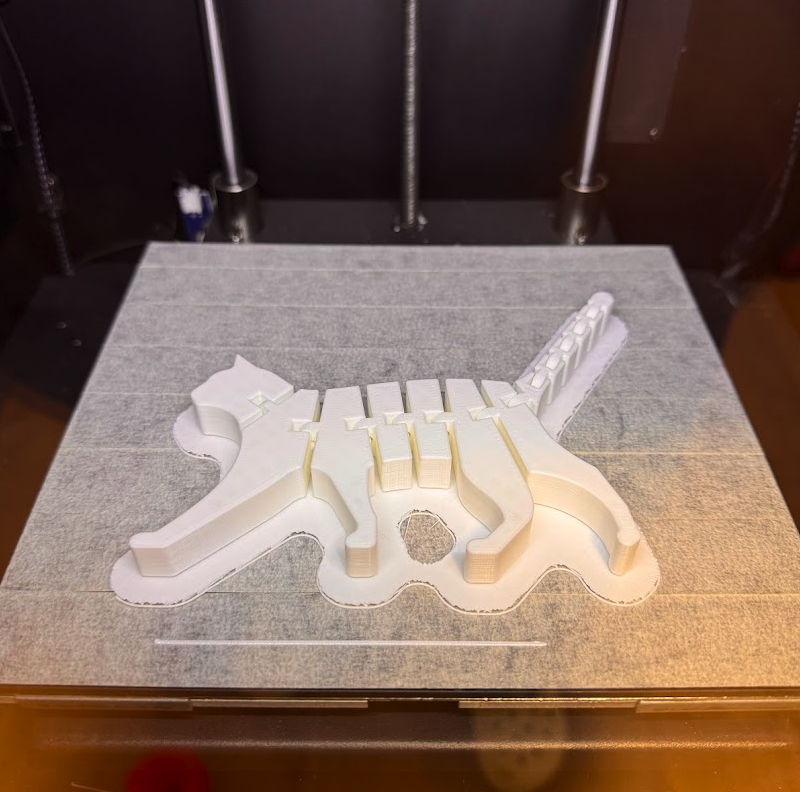
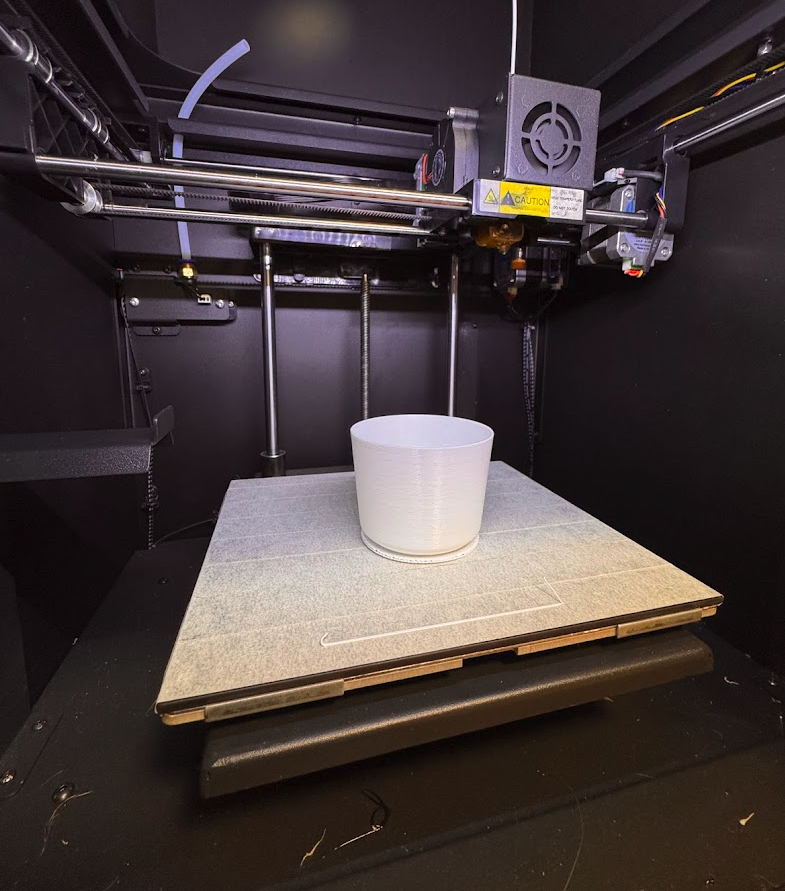
I have now printed this flexi cat that took almost 6 hours. Do you know what I never got it printing correctly? That 3DBenchy that I always tried to print on my first printer. On this one it always causes the printer to shift layers and fail. Surely with some fine tuning of the parameters I can get it right but the lesson learned here is that sometimes a simple vase is a much better goal. Also, sometimes a 3D printer have more success printing larger objects rather than small ones.


Original Blender file source: space_temple_lowpoly.blend
3840 × 2160 rendering: space_temple_lowpoly-3.png
Make sure watch until the gun part.
[youtube:http://www.youtube.com/watch?v=Gnq-8iaOcXk]
Information from the video:
A renderer for Quake 3 Arena maps in immersive environments, based on the Aftershock rendering engine and the CaveQuake wrapper. Shown here in the UC Davis KeckCAVES facility . The video was shot with a tripod-mounted video camera from outside the CAVE.
Finalmente consegui fazer minha placa de vÃdeo voltar a funcionar normalmente, agora que instalei o Ubuntu 7.10.
Voltando a brincar no Blender (versão 2.44) eu vi que agora ele tem uma primitiva nova, o toróide. É uma ótima novidade. Antes era necessário uma certa criatividade para criar figuras como anéis. Para brincar com a novidade, fiz esse desenho de uma chave. Dois toroÃdes foram usados pela cercar uma pedra vermelha.

Aqui uma versão 1280×1024.
Código-fonte: chave.blend