


Como prometido, aqui estão os slides da palestra sobre certificações na Unifor.
Downloads:
Aqui estão as fotos das palestra minha e do Carneiro. Não esqueçam de entrar no Unifor Sun OSUM. 😉
This is a draft of study guide based on SCSNI (Sun Certified Specialist Netbeans IDE) exam objectives.
| Exam Objetive | Resources |
|---|---|
| Section 1: IDE Configuration | |
| 1.1 Demonstrate the ability to configure the functionality available in the IDE, including using enabling and disabling functionality and using the Plugin Manager. | |
| 1.2 Explain the purpose of the user directory and the netbeans.conf file and how these can be used to configure the IDE. | |
| 1.3 Demonstrate the ability to work with servers in the IDE, such as registering new server instances and stopping and starting servers. | |
| 1.4 Describe how to integrate external libraries in the IDE and use them in coding and debugging your project. | |
| 1.5 Demonstrate knowledge of working with databases in the IDE, including registering new database connections and tables running SQL scripts. | |
| 1.6 Describe how to integrate and use different versions of the JDK in the IDE for coding, debugging, and viewing Javadoc documentation. | – |
| Section 2: Project Setup | |
| 2.1 Describe the characteristics and uses of a free-form project. | – |
| 2.2 Demonstrate the ability to work with version control systems and the IDE. (Which VCS’s are available, which ones you need an external client for, how to pull sources out of a repository, view changes, and check them back in). | |
| 2.3 Describe the ways in which you can change the build process for a standard project, such as configuring project properties and modifying the project’s Ant build script. | – |
| 2.4 Configure your project to compile against and run on a specific version of the JDK. | – |
| Section 3: Java SE Development | |
| 3.1 Demonstrate the ability to create NetBeans projects from the source code of an existing Java SE program. | |
| 3.2 Describe how to manage the classpath of a Java SE project, including maintaining a separate classpath for compiling and debugging. | – |
| 3.3 Demonstrate the knowledge of the NetBeans GUI Builder and the ability to lay out and hook up basic forms using it. | |
| 3.4 Demonstrate the ability to package and distribute a built Java Desktop project for use by another user. | – |
| Section 4: Java EE Web Development | |
| 4.1 Describe how to create a NetBeans project from the source code of an existing Web application. | – |
| 4.2 Distinguish between a visual web application and web application. | |
| 4.3 Demonstrate knowledge of which web frameworks are available in NetBeans IDE and how they are added to and used in a web application. | |
| 4.4 Describe how to monitor HTTP requests when running a web application. | |
| 4.5 Demonstrate a knowledge of basic tasks related to building and deploying web applications to a server, such as changing the target server and undeploying an application. | |
| Section 5: Editing | |
| 5.1 Describe the purpose and uses of refactoring and demonstrate the ability to perform basic refactoring on Java source code. | |
| 5.2 Describe how to use the Options window to change the default appearance and behavior of the Source Editor. | – |
| 5.3 Describe the ways that the IDE highlights errors in source code and the tools the IDE offers for correcting those errors. | – |
| 5.4 Demonstrate the ability to use editor hints, such as implementing all the methods for an implemented interface | – |
| 5.5 Demonstrate the ability to use live code templates such as automatic generation of constructors, try/catch loops, and getters and setters. | – |
| Section 6: Testing, Profiling, and Debugging | |
| 6.1 Demonstrate the ability to work with JUnit tests in the IDE, such as creating JUnit tests and interpreting JUnit test output. | |
| 6.2 Describe how to debug a local (desktop) application, including setting breakpoints and stepping through code. | |
| 6.3 Describe the difference between local and remote debugging and describe how to debug a remote (web) application. | – |
| 6.4 Describe the purpose of profiling applications and how to profile a local desktop application in the IDE. | |
More useful resources:
Please, collaborate in the comments with others resource links (with section number). Let’s complete this guide.

Pipes, Creative Commons photo by flattop341.
Internet is full of long urls and meaningless.
Long urls are difficult to remember or print, usually full of redundancy and low semantic. With short and meaningful urls you can avoid thes problems and even achieve profitable goals with SEO
SEO (search engine optimization) technics.
There are services like Tiny URL, Fancy URL, Moo URL and others. Although they solve part of the problems, they bring several others. Another problem is if you have a web site like example.com and use a third-party service for short urls you are losing part of your mind-share with your users and clients.
As an example, if a example.com company wants to promote a open work position would be preferable spread a example.com/jobs instead of a tinyurl.com/examplejobs, or even worst, a tinyurl.com/3i4i592 (meaningless hash).
I created a little program called xort that can be placed on your own server and provide you own short maintening your base url.

I use a pipe abstraction. Each pipe redirects from a key url to an output url.
The idea is that you have xort installed and associated into your domain (preferably on /x). A pipe inside example.com would be like example.com/x/jobs.
All those tools are multi platform, open source and free.
![]()
Glassfish is an open source application server project led by Sun Microsystems for the Java Enterprise Edition (Java EE) platform. It’s very easy to install and run and have a very nice administration web interface where you can do from simple tasks like deploy a application to more complexes like clustering.

Glassfish Admin Console
To develop the application I’m using NetBeans 6.5 Beta that comes with Glassfish V3 prelude b15b. Netbeans also provides a integration of project, database and web server.

Nevertheless, Glassfish has no dependencies with any IDE and perfectly works by alone. If you need I wrote this post explaining how to install and deploy a application on Glassfish from scratch.

MySQL is a relational database management system and probably the most used database on internet (has more than 11 million installations). It’s also very easy to install and administer, through command line or many gui interfaces.
To install MySQL and JDBC driver on Ubuntu just run as root:
# apt-get install mysql-server libmysql-java
After installing and configuring it you can test the jdbc driver throught this servlet code. You can optionally register the MySQL on NetBeans to have a easier access to it thought the service tab.

At the command line you can invoke mysql command line interface and use MySql commands or SQL queries. I’ll login and create a database called xort:
$ mysql -u username -p
Enter password:
Welcome to the MySQL monitor. Commands end with ; or \g.
Your MySQL connection id is 13
Server version: 5.0.51a-3ubuntu5.3 (Ubuntu)Type ‘help;’ or ‘\h’ for help. Type ‘\c’ to clear the buffer.
mysql> create database xort;
Query OK, 1 row affected (0.06 sec)
You could also create this database by an SQL statement:
CREATE DATABASE xort;
To select the database xort:
mysql> use xort;
Reading table information for completion of table and column names
You can turn off this feature to get a quicker startup with -ADatabase changed
mysql>
Now we create a database called pipes with fields pin (pipe in) and pout (pipe out). They represent the input url and the output url of our pipe abstraction.
CREATE TABLE pipes (
   pin varchar(255) NOT NULL,
   pout varchar(255)
);
As we expect a lot of searches queries on this table, we can optionally create a index for it on pin field. This can reduce ours searches from O(n) to O(logn) (because pin’s will be ordered so don’t need to look all pipes, we can use logn algorithms like binary search).
CREATE INDEX pinindex ON pipes (pin);
Another trick to improve our speed is recycling connections through connection pools.

Creating a pool of MySQL connections on Glassfish is very easy. There’re two good tutorials on this subject:
And now we populate the database with some initial pipes.
INSERT INTO pipes VALUES ('blog','http://silveiraneto.net');
INSERT INTO pipes VALUES ('cejug','http://cejug.org/display/cejug/Home');
INSERT INTO pipes VALUES ('orkut','http://www.orkut.com.br/Main#Profile.aspx?rl=ls&uid=12443310329436634134');
INSERT INTO pipes VALUES ('glassfish','http://glassfish.dev.java.net');
INSERT INTO pipes VALUES ('mysql','http://dev.mysql.org');
INSERT INTO pipes VALUES ('twitter','http://twitter.com/silveira');
INSERT INTO pipes VALUES ('lab', 'http://maps.google.com/maps?f=q&geocode=&q=campus+do+pici&g=Fortaleza,+Brazil&ie=UTF8&t=h&ll=-3.745978,-38.574023&spn=0.002452,0.004823&z=18');
INSERT INTO pipes VALUES ('videos', 'http://br.youtube.com/user/NetoSilveira');
INSERT INTO pipes VALUES ('photos', 'http://flickr.com/photos/silveiraneto/');
Basically we have just a program that implement this simple behavior:
To get the key we need to separate the proper part of the request uri:
String uri = request.getRequestURI();
String key = uri.substring(request.getContextPath().length()+1);
After that we check if it matches with a pin of some pipe. In this case we redirect user for the correspondent pout:
response.sendRedirect(pout);
Notice that using this approach we can connect a url to a extern or intern url (even to another pipe).
Check out the xort project and sources at xort.dev.java.net:
Or grab sources and the current build with:
svn checkout https://xort.dev.java.net/svn/xort/trunk xort
Parameters can be passed by the the web.xml file:
   Set if users can add new pipes using the web interface.
allowNewPipes
true

   JDBC driver to use
driver
com.mysql.jdbc.Driver

   Username to login on the database.
username
root

   Password for the given username.
password
yourpassword

   JDBC path to database.
database
jdbc:mysql://localhost:3306/xort
Xort up and running:

[youtube]b2Mrk8XfvKk[/youtube]
[youtube]64u1pYsCnT8[/youtube]
Teddy brincando com a bolinha laranja dele e fazendo charme para as câmeras.
My slides about a overview on JavaFX at our last CEJUG event.
Downloads:


Here a little screncast showing the live preview feature on the NetBeans JavaFX Plugin.
[youtube]vCWQtQgdpUA[/youtube]
You can also download the orignal screencast in higher resolution netbeans_javafx_preview.ogg (15 Mb). Photos of the presentation at my Flickr album.
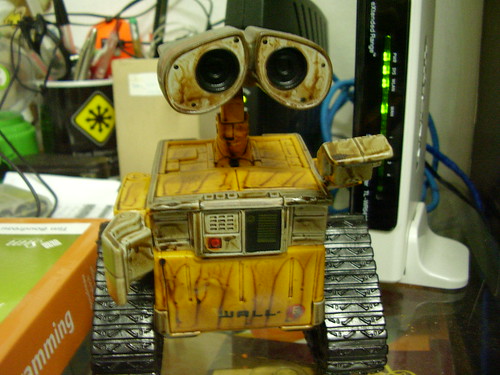
A new toy in my desk. One of many I gave myself in the children’s day this year.
Put on your sunday clothes!
[youtube]iodViuPZBz4[/youtube]
Another impressive talk from TED Ideas Worth Spreading about bonobos monkeys, abilities, language and culture.
Description: Savage-Rumbaugh’s work with bonobo apes, which can understand spoken language and learn tasks by watching, forces the audience to rethink how much of what a species can do is determined by biology — and how much by cultural exposure.
Durante a apresentação do Tarso Bessa em Sobral alguém na platéia perguntou sobre um equivalente a biblioteca GD no PHP. O GD é uma biblioteca para manipulação de imagens comumente usado para criação de imagens dinâmicas (como gráficos) ou miniaturização de imagens. A libGD está disponÃvel para várias linguagens além do PHP.
A respostá para a pergunta é bem simples, você pode usar todo o suporte para imagens disponÃvel no Java SE (inclusive toda a API de Java2D).
Alguns links que podem ajudar:

Esse fim de semana eu, o Rafael Carneiro, Tarso Bessa e o Paulo Sobreira viajamos para Sobral pelo CEJUG para participarmos enquanto palestrantes do 1º Café com Tapioca Sobral.

A minha primeira palestra foi sobre o NetBeans. Hora nós conversei um pouco sobre a história do projeto, a plataforma e as funcionalidades do NetBeans e o que está por vir na próxima versão. Aqui estão meus slides: netbeans_sobral.odp e netbeans_sobral.pdf. Aqui está a versão online em Flash:
Algumas fotos das palestras:


A idéia era fazer a palestra pela manhã e na tarde fazer a prática de NetBeans no laboratório. Porém tivemos alguns impercÃlios e o laboratório não aconteceu. Para quem ficou na vontade, eu recomendo dar assistir o Guided Video Tour do NetBeans.


O Rafael Caneiro apresentou a palestra “Apresentando o CEJUG e o poder do Java“, o Tarso Bessa “Simplificando o Desenvolvimento Web com Java Server Faces” (inclusive me fez ficar bastante motivado para aprender mais sobre JSF) e o Paulo Sobreira “Relatórios em Java com iReport“.

Nossa grande surpresa na viagem foi a presença massiva a do pessoal de ParnaÃba, PiauÃ, notadamente alunos do Sistemas de Informação da Faculdade Piauiense. Eles vieram em Caravana de ônibus e percorreram quase 300km para chegar em Sobral (segundo o Google Maps). Isso sem contar que o ônibus quebrou quando já estava bem perto de Sobral. Eles estão de parabéns pelo empenho.
Durante a tarde eu aproveitei que nós tÃnhamos dois laboratórios e bastante gente e improvisamos uma apresentação sobre certificações Java. Foi bom porque podemos tirar muitas dúvidas e como o Tarso Bessa (SCJP, SCWCD e SCEA) estava lá e pode nos tirar várias dúvidas. Também é uma boa para eles porque eles tem boar oportunidades como o CEJUG Certified e o SAI. Além disso houveram também os mini-cursos “JPA com Hibernate” com o Carneiro e o “JSP e JSF” com o Tarso .

Depois do evento tivemos um tempinho para conhecer mais a cidade. Eu sempre tive muita vontade de conhecer Sobral. Existe uma imensa quantidade de praças, igrejas, locais tombados e museus na cidade. A cidade em si é muito limpa e bem cuidada, os monumentos e a arquitetura original da cidade são muito bem preservados.

Ao lado disso a cidade é bastante desenvolvida, há vários campus universitários e bons restaurantes. Eu confirmei o que eu já tinha ouvido falar mas achei que era só boato, há realmente uma grande rede pública de wifi na cidade. É possÃvel sentar no banquinho da praça, se conectar a rede sem senha e navegar. Um sonho. Além disso há também redes privadas de wifi de provedores de Internet locais.

Nós no “Arco do Triunfo” (na verdade se chama Arco de Nossa Senhora de Fátima) que ilustrou o cartaz do evento.


As crianças de Sobral me ensinaram o grass-surf, uma nova modalidade esportida.
Nós de volta a Fortaleza ao lado do “Carneiromóvel”.

Eu adorei a viagem, faço uma avaliação muito positiva do evento e acredito que vamos colher ótimos frutos. Meu obrigado a todos que organizaram, participaram e patrocinaram o evento.
Há mais fotos da viagem nesse meu álbum.